
A campaign without tracking is like sending a message in a bottle
Imagine sending an important document or marketing piece without knowing when — or even if — it will be delivered.
It’s akin to sending a message in a bottle.
You might get lucky, and the mail will arrive on time, or it might be delayed or lost, leaving you and your customers completely in the dark.
Why Mailers Track and Trace More Than 30,000,000,000 Pieces Per Year
Ensure Timely Delivery: By monitoring the progress of your mail, you can anticipate delivery dates and coordinate follow-up activities more effectively.
Identify and Resolve Issues: If a mail piece is delayed or lost, TNT allows you to quickly identify the problem and take action, such as contacting USPS or rerouting future mailings.
Improve Customer Satisfaction: Providing your customers with reliable delivery information enhances your reputation and demonstrates your commitment to service quality.
Now, let’s dive into how you can get started with BCC Track N Trace in just 7 days.

Using TNT - The First Seven Days
Day 1: Initial Setup
Contact BCC Software to Set Up Your Account
The first step to getting started with TNT is to contact your Strategic Account Manager at BCC Software for a quick demonstration and to answer any questions that you may have.
If you are new to BCC Software, reach out to the sales team at 1 (800) 337-0442 to set up your TNT account. This process is quick and straightforward. Once your account is activated, you’re ready to purchase data credits.
Purchase Usage Credits in the Customer Portal
Data credits are required for using TNT, as each mail piece you track will consume a certain number of credits.
These can be purchased directly through the TNT portal. The process takes just a few minutes, and you can buy as few or as many credits as you need. If you expect to track large volumes of mail, consider contacting your sales representative for bulk discount options.

Day 2: Prepare Your Mailing Job
Add Tracking to Your Mailing Job
If you are using a BCC Software product like BCC Mail Manager, Bulk Mailer, BCC Architect, or BCC Ignite, adding TNT tracking to your mailing job is easy.
For Integrated Users: Mail Manager and Bulk Mailer – Simply follow the wizard in your BCC software product to add tracking and generate barcodes.
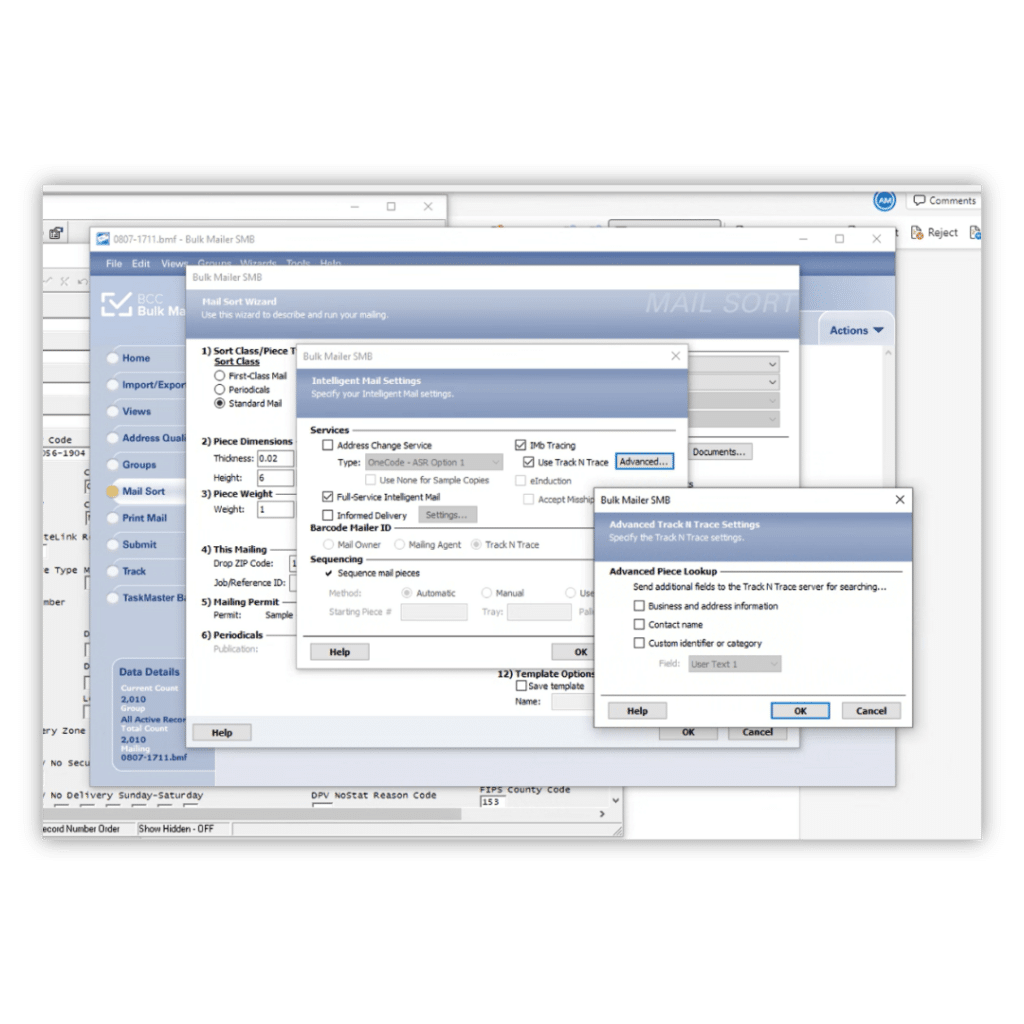
For BCC Architect users, add tracking to the PRESORTAssembly Class (.NET) or to the PresortTask Object (COM).
For BCC Ignite users, contact the BCC Professional Services to gain access to the TNT Macro, and build your automations.
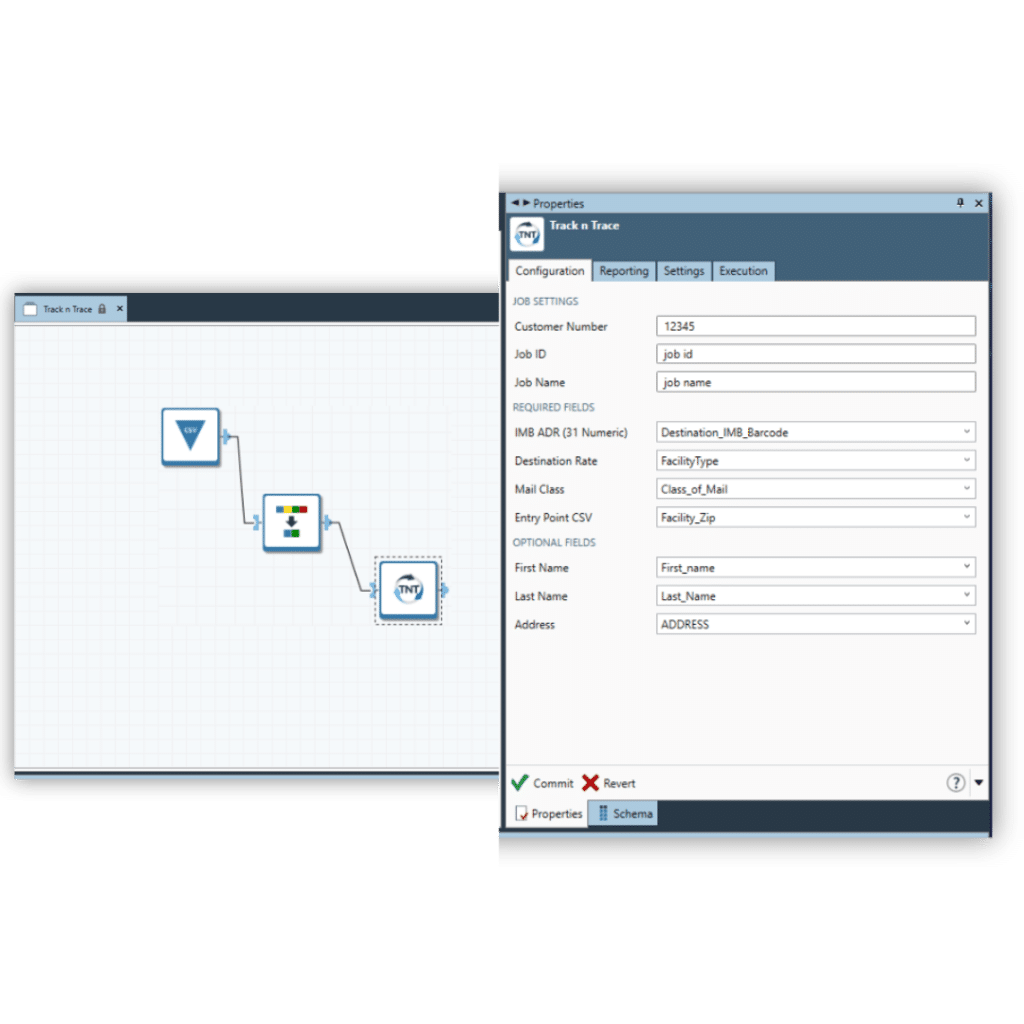
For Non-Integrated Users: If you don’t use one of these products, you can manually upload your mailing information to the TNT portal. Prepare your data file with the necessary tracking information and upload it via the TNT website or through our sFTP. (Please contact Professional Services for file formatting and sFTP credentials.)
Days 3-4: Mailing Drop and Initial Tracking
Drop Your Mail
On Day 3 or 4, your mail should be dropped at a USPS facility. As your mail pieces are processed, USPS will scan the IMb on each piece, and this data will be sent back to BCC Software. Once we receive the scan information, our matching software will compile the data into reports that are easy to read and interpret.
Monitor Initial Scans
Once your mail is in the system, you can log in to the TNT portal to start monitoring its journey. You’ll begin to see scans appear within 24 to 48 hours, showing where your mail pieces are as they move through various USPS facilities.
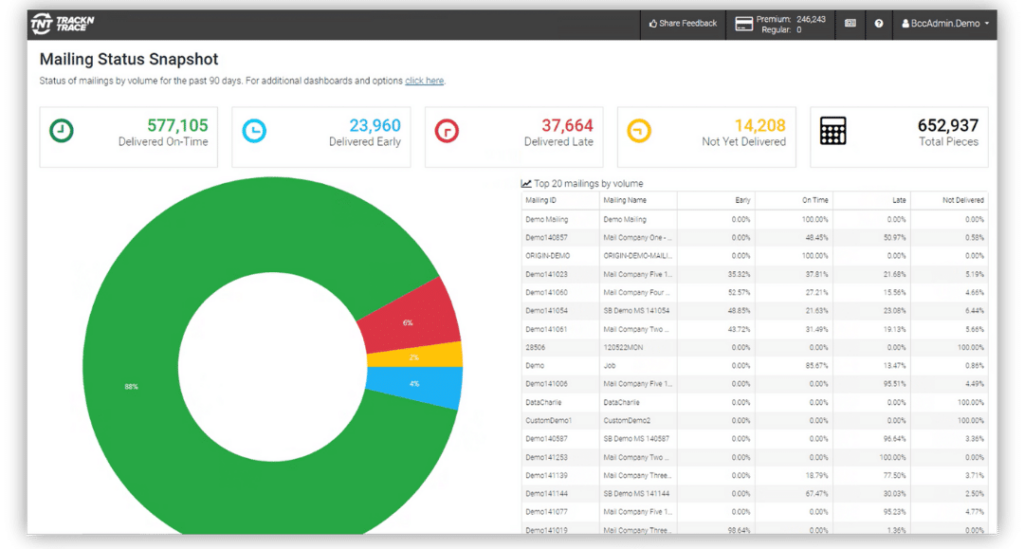
Days 5-6: Monitoring and Reporting
Access Detailed Reports
With the tracking data now available, you can use the TNT portal to access detailed reports on your mailings. These reports provide valuable information on the status of your mail pieces—whether they’ve been delivered, are delayed, or are still in transit. The reports can be customized by ZIP code, facility, or other criteria to give you the specific insights you need.
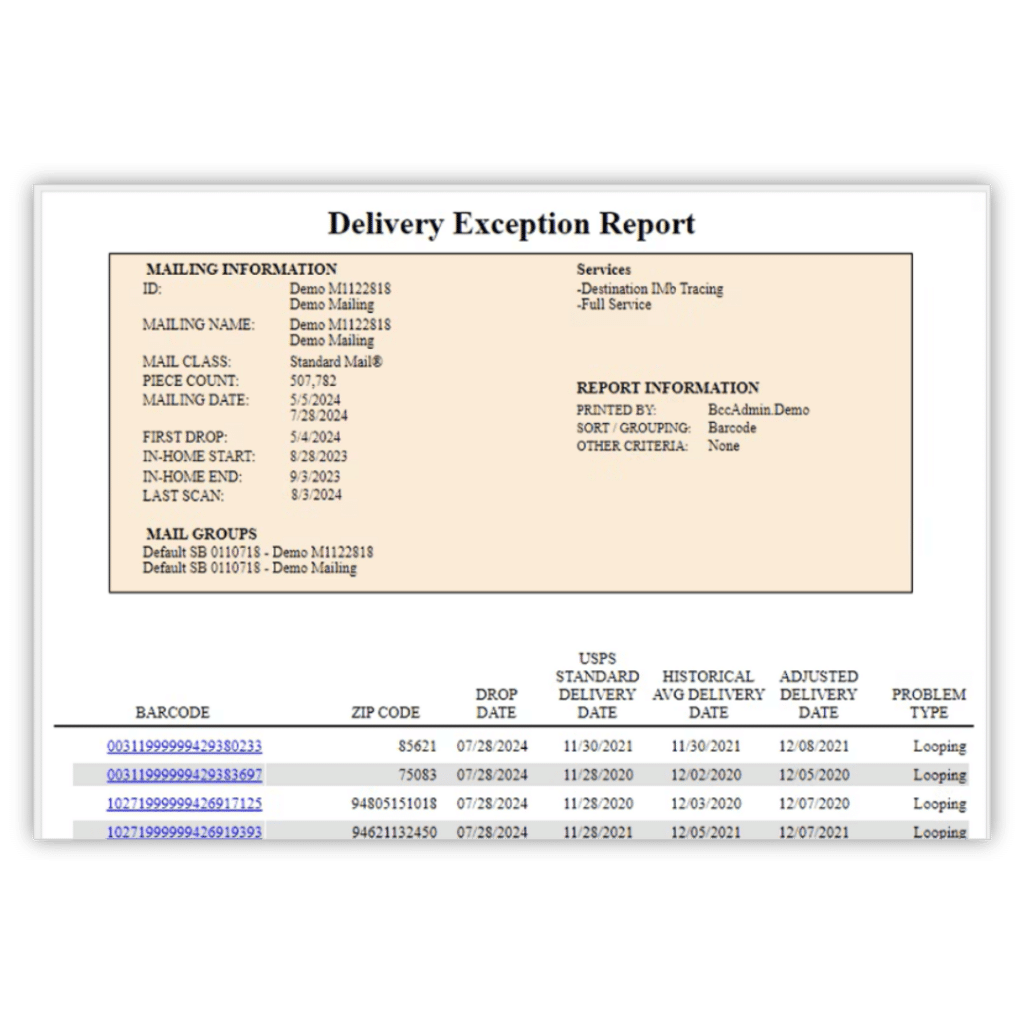
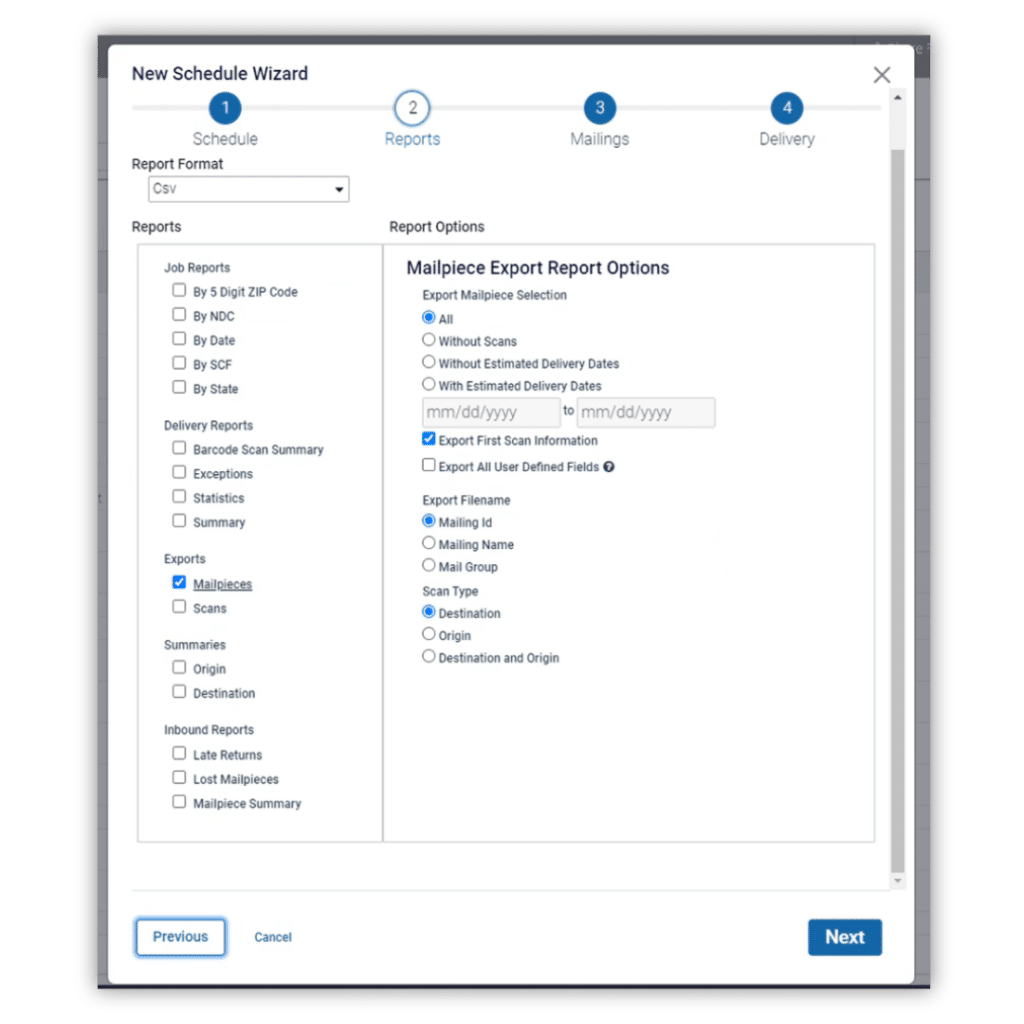
Automate Report Scheduling
To save time and ensure that you and your customers always have the latest information, you can set up automated reports. These reports can be scheduled to be sent directly to your email or shared with your customers, reducing the need for manual checks.
Day 7: Routine Integration and Optimization
Review and Optimize
By Day 7, you’ll have a solid understanding of how TNT works and how it can be integrated into your regular mailing operations. Use the insights gained from your first week to refine your mailing processes. You can adjust mailing schedules, improve delivery times, and ensure that you’re meeting customer expectations consistently.
